GDPR Suite User Guide
Click to Download GDPR Suite plugin

Note: Upload to your wordpress Plugin directory only!
First download the plugin above - Upload the zip file to your wordpress plugin directory

Click to activate the plugin
Note: The plugin is about 4MB, if your media upload size is less than 4MB contact your webhosting to increase upload size, that will fix the upload error: Guide to do it yourself here!

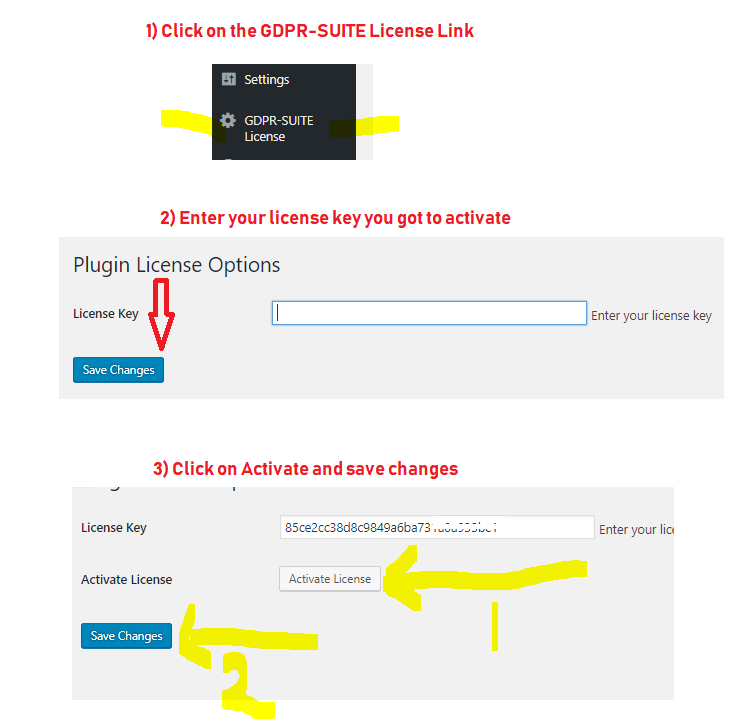
License Key Activation
Cookie Consent
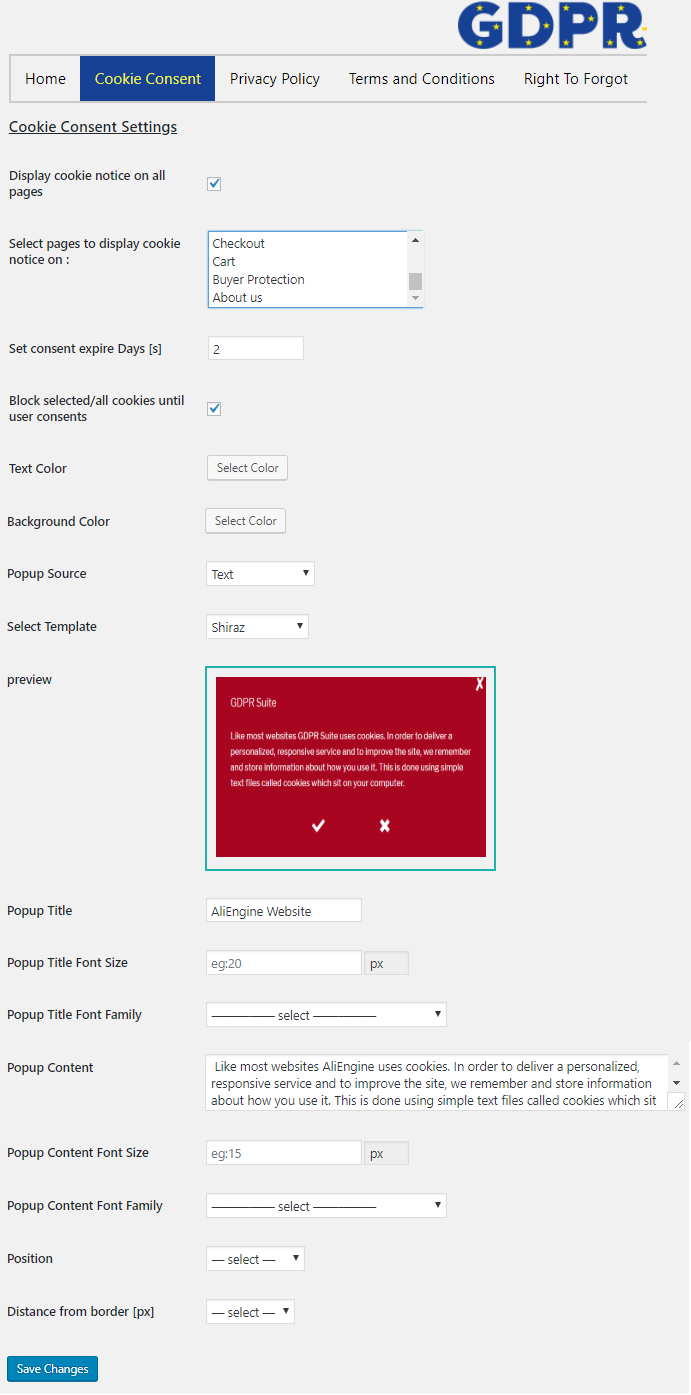
Checklist of Cookie Consent Features
- Display cookie consent on all pages: Option to display cookie on all your pages
- Select pages to display cookie notice on: If you unchecked the option above, select the page you want cookie notice to show on
- Set consent expire Days: The amount of time you want the cookie to be visible
- Block selected/all cookies until user consents: Your visitor will have to consent in other to interact with your website
- Text Color: The color you want your cookie notice text to be.
- Background Color: Your choice background color of your cookie box
- Popup Source: We have 4 popup option to select from, None, text, link and autoresponder
- Select template: When you select any of your popup source choice you will need to select the template design you want
- Preview: Now your cookie notice will look like in your store
- Font Title: This is where to enter your header or subject of your cookie notice
- Popup Title Font Size: The recommended size here is 20px, make sure to add the "px" with the font number
- Popup Title Font Family: Select your choice font family
- Popup Content: Here is where you will enter the text body of your cookie notice
- Popup Content Font Size: The font size should be in pixel "px" recommended 12px
- Position: Where you want to display the cookie notice popup, we have 5 options
- Distance from border [px]: The popup border size
Privacy Policy

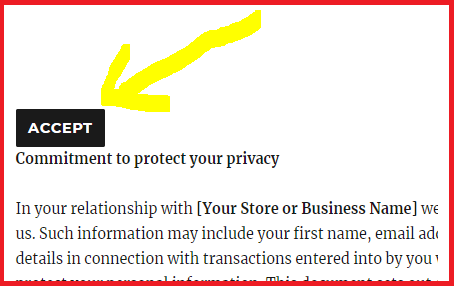
Guide To Add Privacy Policy Button On Your Privacy Policy Page
- Require logged in users to accept policy and Conditions (redirect): This option requires your user to first login before they can proceed
- Require not logged in guest to accept policy and Conditions (redirect): When this box is checked, non logged in users will be required to accept your policy before they can proceed
- Page to redirect to after policy accepted: Select the page you want them to be redirected to when they accept your policy
- Set consent expire Days [s]: Enter the number of days before the policy consent can expire
We have a unique short code that you can add on your Privacy policy page...
First you have to create a privacy policy page....
To do this click on your "pages", "add new", enter the title and your privacy policy content, followed by your short code.
The code to add to your privacy policy page is:
Terms and Conditions
Just like the Privacy Policy, your Terms and Condition is setup the same method
The only difference is the short code: - which should be placed on the terms and condition page you created.
Right To Forget
Your website users has the right to request that you delete all their data you have on file, and below is how to set it up.
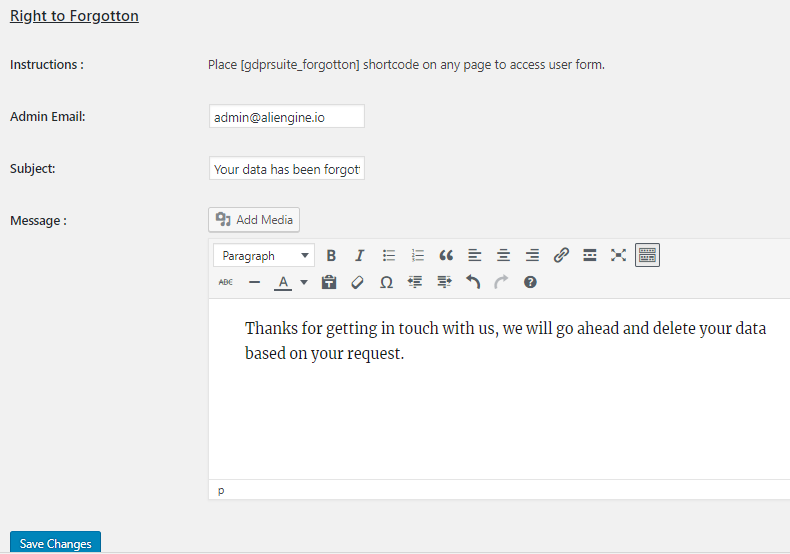
- Admin Email: The email address of the website administrator
- The subject title of the mail
- The email content you want to send to the user that requested their data be deleted, informing them that it has been deleted
Note: Before a user or your site visitor can send you a message requesting data deletion they must have given you their data in the first place.
Where can They Send Their Forget Me Request?
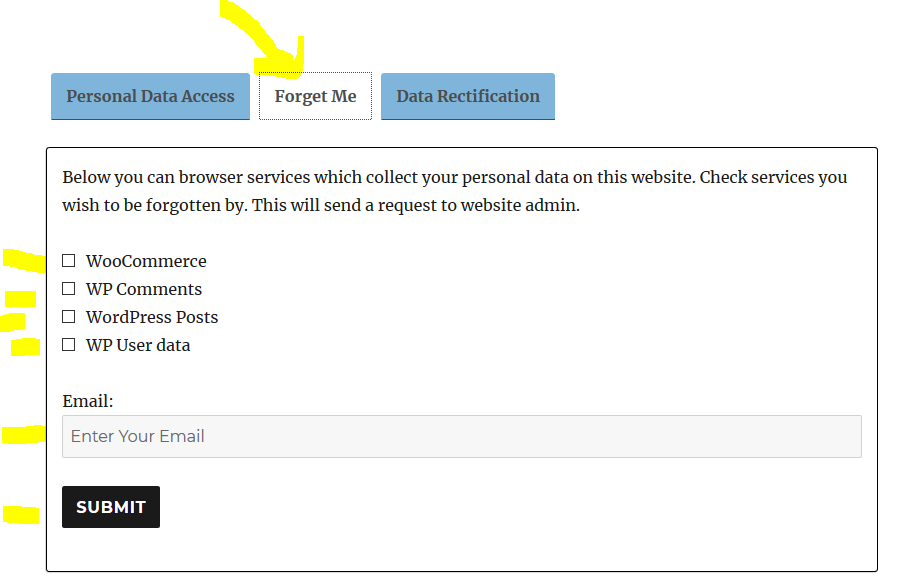
Create a new page and add the short code: Your page preview should look like below... If you use a different theme it might look slightly different When you receive a deletion request you will be able to see it at the bottom of your "Right to forget" tab

